
If you have ever come home to find your basil plant looking like it just gave up on life, you have likely asked yourself if there is a better way. That was exactly where I found myself. I was tired of the “drama” my herbs gave me if I missed watering by just a few hours. I kept seeing these self-watering pots online, promising lush greenery with half the effort, but they cost nearly three times as much as the standard pots I was using.
I wanted to know if the extra cost actually translated to better herbs or if it was just a marketing gimmick. So, I decided to run a side-by-side test. I didn’t just read about it; I set up a four-month experiment in my own living room to see which pot style actually earned its keep.
I’m wissam saddique. I’m just a guy living in a small apartment trying to grow decent herbs without turning my living space into a mud pit. My journey into indoor gardening started out of necessity—I wanted fresh flavors but didn’t have a backyard. Over time, I realized that keeping plants alive in small spaces is less about having a “green thumb” and more about finding the right gear that fits a busy lifestyle. I’ve spent a lot of time testing different containers and soil mixes on my windowsills to figure out what actually works for indoor growers like us.
The Experiment Setup: A Fair Fight
To make this comparison useful for you, I had to ensure the playing field was level. If I treated one plant better than the other, the results wouldn’t mean anything. Here is exactly how I set up this four-month showdown.
- The Contenders:
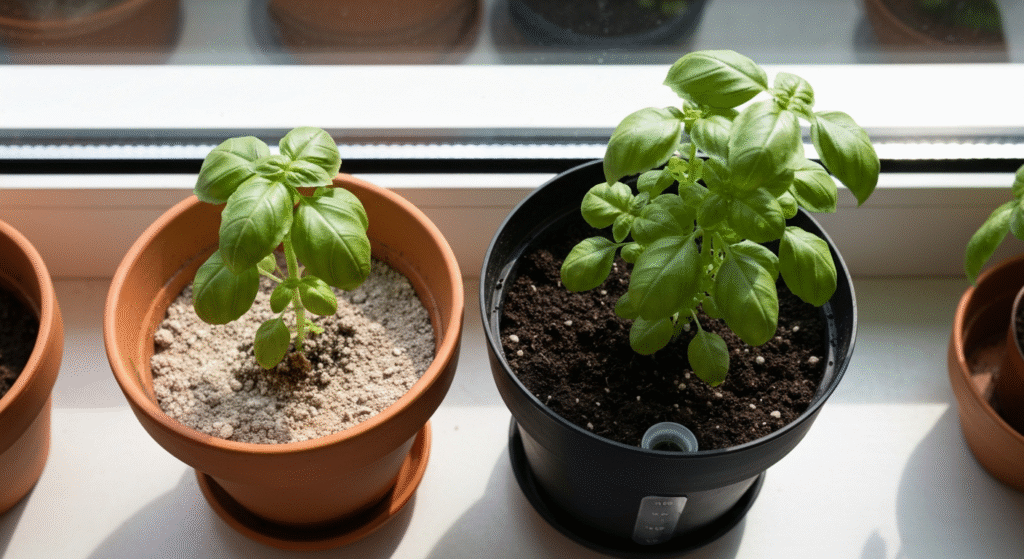
- Pot A (Self-Watering): A 6-inch plastic pot with a bottom reservoir, a wick system, and a water level indicator. Cost: $15.
- Pot B (Traditional): A standard 6-inch plastic pot with a matching saucer for drainage. Cost: $6.
- The Plants: I used sweet basil (Ocimum basilicum) for this test because basil is notoriously dramatic about water. If a pot has a flaw, basil will show it immediately. Both starts were purchased from the same nursery on the same day and were roughly 4 inches tall at the start.
- The Environment: Both pots sat on the same south-facing windowsill. My apartment temperature stayed consistently between 65°F and 75°F throughout the test.
- The Soil: I used the exact same premium potting mix in both containers to rule out nutrient differences.
I wasn’t looking for scientific perfection, but I was looking for practical, real-world answers. I wanted to see how these pots handled daily life, occasional neglect, and the general environment of a typical apartment.
Month 1: The Adjustment Period
The first thing I noticed wasn’t about the plants; it was about the setup. The traditional pot was ready to go in seconds. I put soil in, planted the basil, and watered it. Done.
The self-watering pot required some assembly. I had to thread the cotton wick through the bottom platform, snap the water gauge into place, and ensure the reservoir was seated correctly. It wasn’t difficult, but it was definitely more involved than the $6 option.
Watering Habits
During the first few weeks, I watered the traditional pot every 2-3 days. I had to check it constantly. The basil in the traditional pot would droop slightly if I pushed it to day 4.
The self-watering pot was a different story. I top-watered it for the first two weeks to help the roots settle (a crucial step many people miss). Once the roots were established, I filled the reservoir. I found myself refilling that reservoir only once every 7 to 9 days.
Early Observation: The surface soil in the self-watering pot stayed consistently moist to the touch, almost like a damp sponge. The traditional pot soil cycled between wet and dry.
Month 2: The Growth Spurt
By the second month, the differences started to become visible. This is where the consistency of the self-watering system really started to shine.
The basil in the self-watering pot seemed to accelerate. Because the moisture level was constant, the plant never had to hit the “pause” button to conserve energy during a dry spell. It just kept pushing out leaves. I measured the height at the end of month two. The self-watering basil was roughly 9 inches tall and very bushy.
The traditional pot basil was healthy, don’t get me wrong. It was about 7 inches tall. However, the leaves were slightly smaller, and the stems were becoming a bit woodier. I suspect this was because of the stress cycles. Every time the soil dried out, the plant hardened off a little bit to protect itself.
The Algae Issue
Here is a downside I didn’t anticipate with the $15 pot. The water level indicator was clear plastic. Because it was sitting in the sun, a small amount of green algae started to form inside the tube. It didn’t hurt the plant, but it looked a bit messy. The traditional pot didn’t have this problem, though the saucer did get a ring of mineral deposits from the tap water runoff.
Month 3: Maintenance and “Vacation Mode”
Life got busy in month three, which was the perfect stress test. I had to leave town for a four-day weekend.
The Traditional Pot Strategy: I watered it heavily right before I left. When I came back four days later, the soil was bone dry, and the basil was significantly wilted. It bounced back after a soak, but it lost a few lower leaves in the process.
The Self-Watering Pot Strategy: I topped off the reservoir before leaving. When I returned, the gauge showed it was still half full. The plant looked exactly the same as when I left.
This specific weekend convinced me of the value of the self-watering mechanism. The mental load of worrying about my plants while I was away was completely gone.
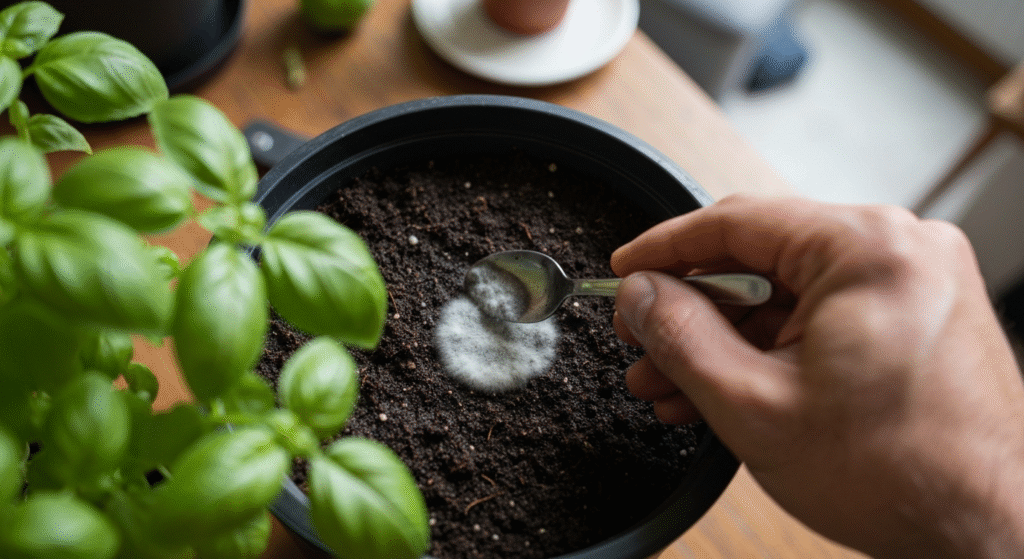
However, I did notice something concerning in the self-watering pot around week 11. The top of the soil developed a fuzzy white mold. Because the soil never truly dried out, the surface stayed damp enough for mold spores to germinate. I had to scrape off the top layer of soil and sprinkle some cinnamon (a natural fungicide) to keep it in check. The traditional pot, which had periods of drying out, never had mold issues.
Month 4: Root Health and Final Yield
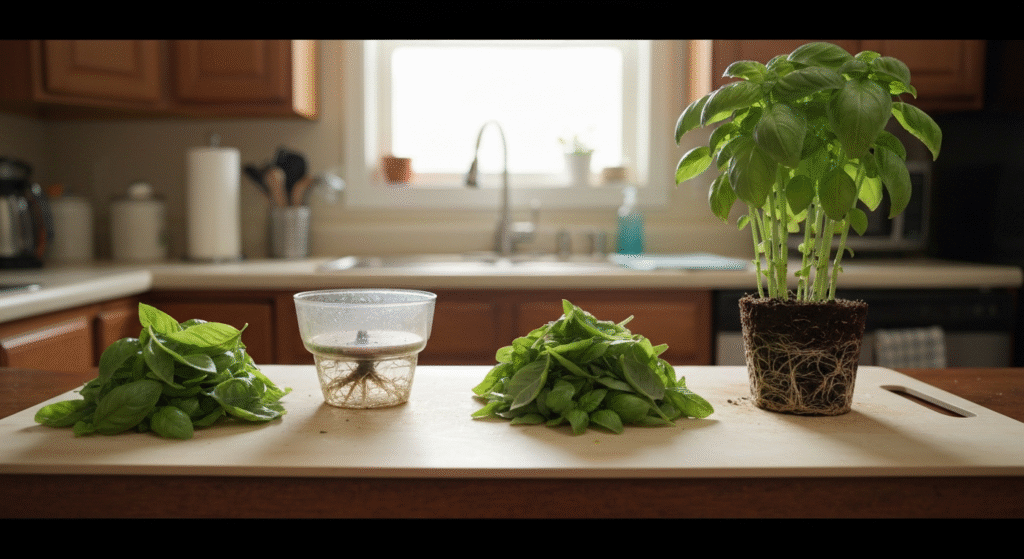
At the end of the four months, I decided to unpot both plants to look at what was happening underground. The root systems told the whole story.
Traditional Pot Roots: The roots were thick and circled the bottom of the pot heavily. They were searching for water. There was a high density of roots at the very bottom, sitting in the drainage layer.
Self-Watering Pot Roots: The roots were more evenly distributed throughout the soil. However, some roots had grown right through the wick slots and were dangling directly into the water reservoir. While the plant looked healthy, this can eventually lead to root rot if the water stagnates. I realized I should have flushed the reservoir more often.
The Harvest:
I weighed the usable leaves from both plants.
- Self-Watering Pot: 4.5 ounces of fresh basil.
- Traditional Pot: 3.2 ounces of fresh basil.
The $15 pot produced about 40% more basil. The leaves were also more tender, likely because they grew faster and had constant hydration.
Detailed Breakdown: Watering Mechanics
It is helpful to understand why these results happened. It comes down to how water moves.
In the traditional pot, water moves via gravity. You pour it on top, it soaks down, and gravity pulls the excess out the bottom. This creates a vertical moisture gradient—wet at the bottom, drier at the top. As the water evaporates, air pockets open up in the soil, which is good for roots, but if you wait too long, those roots dry out and die.
In the self-watering pot, water moves via capillary action (wicking). The water sits below the soil. The soil or a wick pulls the water up against gravity, exactly as much as it needs. This keeps the moisture level remarkably stable. It eliminates the “feast or famine” cycle of watering. However, it also reduces the amount of air circulation in the soil, which is why I saw the mold issue.
Comparing the Costs
Is the price jump justified? Let’s look at the numbers.
| Item | Traditional Setup | Self-Watering Setup |
| Pot Cost | $6.00 | $15.00 |
| Soil Used | Same | Same |
| Water Used | Slightly more (due to runoff) | Less (closed system) |
| Fertilizer | Flushed out with watering | Stayed in the soil longer |
| Total Investment | Low | Moderate |
Note: These prices are averages based on what I paid at my local garden center and online.
If you are growing a single plant, $9 isn’t a huge difference. But if you plan to have an entire herb garden with 10 plants, you are looking at $60 versus $150. That is a significant difference for a budget gardener.
However, you also have to value your time and the cost of replacing dead plants. If the self-watering pot saves you from killing a $5 basil start twice a year, it pays for itself in the first year.
My “Honest Truth” Pros and Cons
After living with these pots for 120 days, here is my unfiltered take on the strengths and weaknesses of each.
Traditional Pot ($6)
Pros:
- Hard to Overwater: If you have a saucer, excess water leaves. It’s safer for plants that hate wet feet (like Rosemary).
- Cheap: You can buy three for the price of one self-watering pot.
- No Assembly: Just fill and plant.
- Airflow: The wet-dry cycle pulls fresh oxygen into the roots.
Cons:
- High Maintenance: You are the timer. If you forget, the plant suffers.
- Messy: Water runoff can stain your windowsill if the saucer overflows.
- Slower Growth: The stress of drying out can slow down leafy herbs.
Self-Watering Pot ($15)
Pros:
- Explosive Growth: Constant moisture leads to bigger, bushier herbs.
- Peace of Mind: You can go away for a weekend without hiring a plant sitter.
- Cleaner: No water leaks or overflowing saucers.
- Water Efficient: No water is wasted; the plant drinks what it needs.
Cons:
- Mold Risk: Constant surface moisture can invite mold or gnats.
- Price: significantly higher upfront cost.
- Salt Buildup: Fertilizer salts don’t flush out; they accumulate in the soil over time.
Who Should Buy Which?
This experiment clarified that there isn’t one “perfect” pot. It depends entirely on your lifestyle and what you are growing.
Buy the Self-Watering Pot If:
You travel frequently, or you are simply forgetful. If you have a history of finding crispy, dead plants on your windowsill, this pot is a game-changer. It is also the superior choice for moisture-loving herbs like Basil, Mint, and Parsley. The growth rate is undeniably better.
Buy the Traditional Pot If:
You are on a tight budget or you are growing drought-tolerant herbs. Mediterranean herbs like Rosemary, Thyme, and Oregano actually prefer their soil to dry out between waterings. Putting them in a self-watering pot is often a death sentence because the soil stays too wet for them. Stick to the $6 pot for these woodier herbs.
Frequently Asked Questions
1. Do self-watering pots cause root rot?
They can if the soil stays too soggy. Most self-watering pots have an overflow hole to prevent the water reservoir from drowning the roots. However, if you use a very dense soil that holds too much water, the roots might rot. I recommend adding a handful of perlite to the mix to keep things airy.
2. Can I use self-watering pots for all herbs?
I wouldn’t recommend it for everything. They are amazing for thirsty plants like Basil, Mint, and Cilantro. They are risky for plants that like to dry out, such as Rosemary, Lavender, and Thyme. For those, traditional pots are safer.
3. How often do you really have to refill the reservoir?
In my test, with a 6-inch pot, I refilled it every 7 to 10 days. As the plant got bigger in Month 4, it drank more, and I had to refill it every 5 or 6 days. It’s still much better than watering every other day.
4. Do I still need to water from the top?
Only when you first plant your herb. You need to water from the top for the first two weeks to ensure the roots grow down enough to benefit from the wicking action. After that, you only fill the bottom reservoir.
The Final Verdict
After four months of watching these plants grow, I have made a permanent switch in my apartment—but only partially.
I have moved all my Basil and Mint into self-watering pots. The difference in leaf production and the reduction in my daily stress levels is worth the extra $9 per pot. I love being able to leave for a weekend without worrying.
However, my Rosemary and Thyme are staying in the traditional $6 pots. They just don’t need the constant moisture, and frankly, they seem happier when I ignore them for a few days.
If you are debating the purchase, my advice is to start with one self-watering pot for your thirstiest plant. You will likely find, as I did, that the convenience pays for itself very quickly.
For more detailed information on container gardening best practices, the University of Maryland Extension offers excellent resources on soil and watering needs.