We’ve all been there. You have a great idea—a feeling, a scene, a marketing angle—but it’s stuck in your head. Getting it onto the screen as a visual concept used to mean hours of stock photo hunting, rough digital painting, or trying to explain your abstract thought to a designer. The friction between a raw idea and a tangible visual was huge. This is where using AI to turn rough ideas into visual concepts has completely changed my creative process.
It’s not about pushing a button and getting a finished product. For me, AI is a collaborator. It’s an incredibly fast, tireless assistant that helps me brainstorm, iterate, and bridge the gap between a simple sketch and a concept that truly clicks. In this post, I’m going to walk you through my exact workflow: from a rough-idea sketch, through AI-powered generation, and into the final human-led edits.
My name is John Michael. For years, I’ve been exploring and writing about AI, not just as a technology, but as a practical tool for creative work. My focus has always been on bringing research and clear explanations to readers. After working in this creative space, I’ve refined a process that doesn’t replace human skill but amplifies it. My goal is to share that process with you, showing how AI can become a powerful partner in your own design and marketing work.
The Foundation: Why a ‘Human-First’ Sketch Still Wins
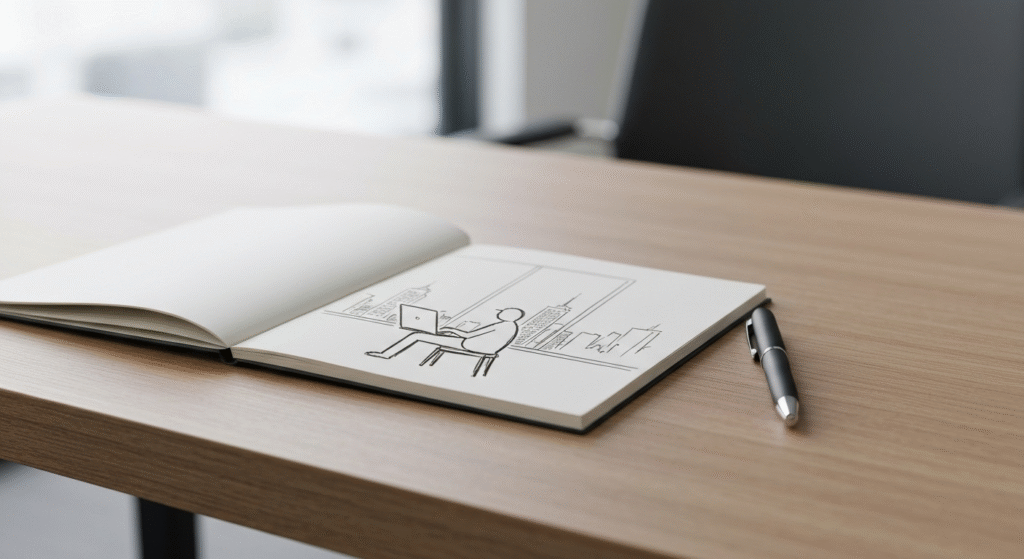
Before I even think about opening an AI tool, I start with the most low-tech tools available: a pen and a notebook (or a simple tablet canvas). It’s tempting to jump straight into prompt engineering, but I’ve learned that this is a critical mistake.
AI is powerful at visualizing, but it’s terrible at conceptualizing. It doesn’t know your audience, your brand’s message, or the specific emotion you need to convey. That’s your job.
My “bad sketch” isn’t about art; it’s about intent.
- Composition: Where does the main subject go? Is it a close-up or a wide shot?
- Elements: What objects must be in the scene? A person? A product? A specific background?
- Focus: What is the single most important thing the viewer should see?
- Feeling: What is the mood? Is it hopeful, serious, energetic, or calm?
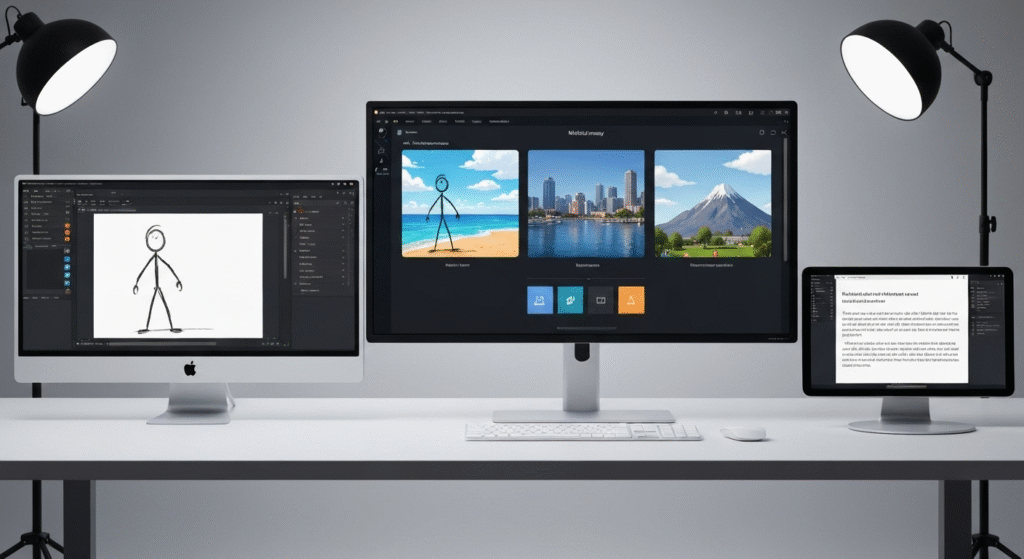
Starting with a sketch, no matter how messy, anchors the entire project. It solidifies the idea in my own mind and gives me a concrete blueprint. When I skip this step, I find myself “prompt-wandering”—endlessly generating images hoping the AI will randomly stumble upon my idea. The sketch saves me hours of time by defining the target before I start shooting.
My Step-by-Step Workflow: From Napkin Sketch to AI Concept
My process is a three-part loop: Idea (Sketch) -> Iteration (AI) -> Refinement (Edit). Let’s break down each step.
Step 1: The Brief and the ‘Bad Sketch’ (The Idea Phase)
This first step is all about translation. I take a core idea and turn it into a set of visual instructions.
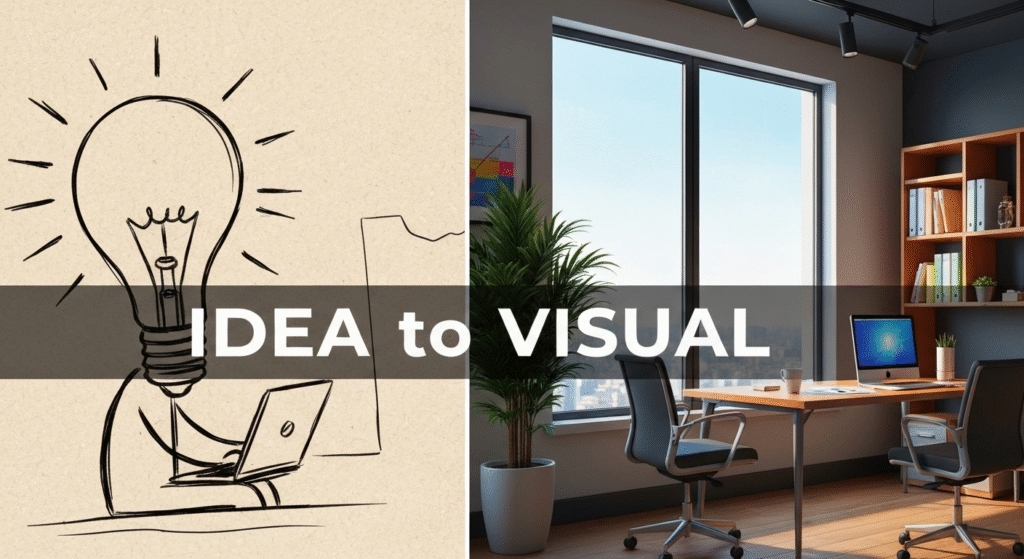
Let’s imagine a client needs a blog post header for an article titled “The Future of Remote Work.”
- Define the Core Idea: The client wants to show that remote work is no longer just “working from home” but “working from anywhere.” The feeling should be professional but also inspiring and free.
- Ask Key Questions:
- Who is the audience? Professionals, marketers, and tech leaders.
- What’s the message? Work is flexible, modern, and integrated with life.
- What’s the mood? Bright, clean, optimistic, and slightly futuristic.
- Create the ‘Bad Sketch’: I’ll grab my notepad and sketch something simple. I’m not an illustrator, and that’s okay. My sketch might be:
- A simple box for a laptop on a small table.
- A stick figure sitting in a chair.
- The key element: Instead of an office wall, the background is a huge, open-air window or balcony looking out over a stunning, slightly futuristic cityscape or a beautiful natural landscape (like a beach).
- I’ll add a sticky note: “Clean, minimalist. Bright light. Focus on the view.”
This simple sketch gives me my subject (person with laptop), my setting (modern balcony/window), and my mood (bright, open, inspiring). Now, I’m ready for the AI.
Step 2: Translating the Sketch into an AI ‘Creative Brief’ (The Prompting Phase)
This is the most important skill in my AI workflow. I call it creating a ‘Creative Brief’ for the AI because a simple prompt like “person working remotely” is useless. It will give me a generic, boring stock photo.
I build my prompts in layers, just like my sketch. My typical structure is:
[Style] + [Scene/Setting] + [Subject/Action] + [Aesthetics/Mood]
Based on my “Future of Remote Work” sketch, here’s how I’d build the prompt:
- Style: “A high-resolution, cinematic, photorealistic wide-angle shot.”
- Scene/Setting: “from inside a minimalist, modern apartment with a floor-to-ceiling glass window.”
- Subject/Action: “A person (gender-neutral, back to camera) sits at a sleek wooden desk with a laptop, looking out over a beautiful, sunny beach scene.”
- Aesthetics/Mood: “The lighting is bright and natural, coming from the window. The atmosphere is calm, focused, and inspiring. Clean, professional aesthetic.”
Full Prompt: “A high-resolution, cinematic, photorealistic wide-angle shot, from inside a minimalist, modern apartment with a floor-to-ceiling glass window. A person (gender-neutral, back to camera) sits at a sleek wooden desk with a laptop, looking out over a beautiful, sunny beach scene. The lighting is bright and natural, coming from the window. The atmosphere is calm, focused, and inspiring. Clean, professional aesthetic.”
Notice how this prompt is a direct translation of my sketch and brief. It tells the AI exactly what to build.
Prompting: From Simple Idea to Detailed Brief
This table shows how I escalate a simple idea into a prompt that gets results.
| The Simple Idea | A Bad, Vague Prompt | My Detailed ‘Creative Brief’ Prompt |
| A car | “A photo of a red car” | “A high-resolution, side-profile commercial photograph of a glossy red electric sports car. The car is driving on a wet, reflective city street at dusk. Modern, sleek, dynamic motion blur on the wheels and background.” |
| A person traveling | “Solo traveler on a mountain” | “Cinematic wide-angle shot, a solo traveler with a large backpack (back to camera) stands on a rocky cliff edge. They are looking out over a vast, misty green valley at sunrise. The mood is adventurous and epic. Style of a travel magazine photo.” |
| A team working | “People in a meeting” | “A candid, bright-light photo of a diverse group of 3-4 people in a modern, sunlit office. They are collaborating around a white table, smiling and looking at a tablet. The atmosphere is creative, positive, and engaged.” |
Step 3: Generation and Iteration (The ‘Slot Machine’ Phase)
I almost never get the perfect image on the first try. This is where experience comes in. The first batch of AI-generated images are not failures; they are new ideas.
- Generate and Analyze: I’ll run my “remote work” prompt and get four options.
- Image 1: Great lighting, but the person is facing the camera (I wanted back to camera).
- Image 2: Perfect person and desk, but the “beach” looks fake and low-quality.
- Image 3: The beach is stunning, but there’s no person.
- Image 4: The mood is dark and rainy (the AI ignored my “sunny” cue).
- Iterate and Refine: This is a conversation. I don’t start over. I refine.
- Tweak the Prompt: The AI is struggling with the person and the beach. I’ll strengthen the prompt: “A high-resolution… person’s back is to the camera… looking out over a photorealistic, beautiful, sunny tropical beach.” I might also add a negative prompt:
--no rain, --no dark, --no facing camera. - Use Control Tools: If the AI (like Midjourney or DALL-E) has an “inpainting” or “vary region” feature, I’ll use it. I’ll take Image 2 (good person, bad beach) and select the entire window, then re-prompt only that area with: “a beautiful, photorealistic, sunny tropical beach scene.”
- Image-to-Image (img2img): If I’m using a tool like Stable Diffusion, I might even upload my original bad sketch as a reference (or Image 2) and use it as a structural guide for new generations. This gives me more control over the composition I sketched in Step 1.
- Tweak the Prompt: The AI is struggling with the person and the beach. I’ll strengthen the prompt: “A high-resolution… person’s back is to the camera… looking out over a photorealistic, beautiful, sunny tropical beach.” I might also add a negative prompt:
I repeat this process 3-5 times, saving the best parts of each generation. I’m not looking for one perfect image. I’m “kitbashing”—looking for a perfect foreground, a perfect background, and perfect lighting. I know I can combine them later.
Choosing Your AI Co-Pilot: A Practical Comparison
Designers and marketers often ask me which AI tool to use. The truth is, I use different tools for different jobs. The “best” tool is the one that fits your specific task.
Here are my go-to choices for this concepting workflow.
| AI Tool | Best For… | My Typical Use Case | Learning Curve |
| Midjourney | Highly artistic, stylized, and “epic” concepts. Fantastic for mood and atmosphere. | When I need a “wow” factor. Great for fantasy scenes, dramatic landscapes, or highly polished, aesthetic brand images. | Moderate. The prompts are simple, but mastering parameters and styles takes practice. |
| DALL-E 3 (in ChatGPT/Copilot) | Following complex prompts exactly. It’s great at understanding natural language and including small details. | When the details really matter. “A red 1950s diner with a ‘JOE’S’ sign and a blue car parked out front.” It’s also my first stop for quick brainstorming. | Easy. It’s built to be conversational. |
| Stable Diffusion (via tools like Fooocus or ComfyUI) | Ultimate control. Using your own sketches (img2img), controlling character poses, and fine-tuning. | When my sketch’s composition is non-negotiable. Also used for extending images (outpainting) or fixing very specific details. | High. This is for users who want to be “in the weeds” with settings, models, and nodes. |
For most designers and marketers, starting with DALL-E 3 is the easiest way to get precise results, while Midjourney is the best for stunning, high-impact visuals.
The Final 50%: The Human Touch (The Editing Phase)

This is the step that separates a generic “AI image” from a professional, polished visual concept. AI gets me 50-80% of the way there. My skills as a creative professional provide the final, critical 20-50%.
I never, ever use a raw AI generation as a final product. Every single concept I create goes into a photo editor like Adobe Photoshop, Affinity Photo, or Canva.
Why I Always Use a Post-Production Editor
Here’s what I’m doing in this final, human-led stage:
- Compositing (Kitbashing): Remember those 3-5 images I saved? I’ll take the perfect person from Image 2, the stunning beach from Image 3, and composite them together. I’ll use layer masks and blending tools to create the one image that my prompt couldn’t quite nail on its own.
- Fixing AI Weirdness: AI is notorious for errors. I’m talking about slightly-too-long fingers, warped text on a laptop, a blurry-looking tree, or a weird shadow. The editing phase is where I (the human) go in and clean all of this up. This is essential for trustworthiness.
- Color Grading and Mood: The AI might give me a “sunny” image, but I want a specific mood. In Photoshop, I’ll apply a color lookup table (LUT) or use a Camera Raw filter to adjust the colors. I can make it warmer, cooler, more or less saturated, or add a slight cinematic teal-and-orange grade to match a brand’s aesthetic.
- Adding Text and Branding: The visual concept is just the base. Now I add the blog post title “The Future of Remote Work.” I can add a subtle company logo, a call-to-action, or other graphic elements. The AI just built the stage; I’m directing the final show.
A Real-World Example: Concepting a ‘Solo Travel’ Blog Image
Here’s how this entire process came together for a recent project.
- Idea: An article about the “freedom and challenge” of solo travel.
- Sketch: A stick figure (back to camera) standing on a high cliff, looking over a huge valley. I drew a “fork in the road” in the valley to symbolize “challenge/choice.”
- AI Tool: I chose Midjourney for its “epic” and “cinematic” style.
- Prompt: “cinematic wide-angle shot, a solo female traveler with a backpack stands on a rocky cliff edge at sunrise, back to camera, overlooking a vast, misty green valley. A small dirt path forks in two directions in the valley below. Epic, adventurous, hopeful. photorealistic. –ar 16:9”
- AI Output: The first generations were beautiful! The valley and traveler were perfect. But the AI completely ignored the “fork in the road.” It just put a single, winding river.
- Iteration: I tried re-prompting, but it couldn’t get the fork right. So, I pivoted. I generated a separate image: “top-down aerial shot of a dirt path forking in a green forest. photorealistic.”
- Edit (Photoshop):
- I took my favorite “traveler on the cliff” image (Image A).
- I took the “fork in the road” image (Image B).
- In Photoshop, I masked Image B and composited the fork onto the valley floor of Image A. I blended the edges, matched the lighting and color, and added a bit of mist over it to make it look natural.
- Finally, I did a full-color grade to enhance the sunrise and make the scene feel more inspiring.
The final image was 100% unique and perfectly matched my original idea. The AI did the heavy lifting, but my human direction and editing skills brought the concept to life.
Common Pitfalls and How to Avoid Them
After years of working with these tools, I see beginners make the same mistakes. Here’s how you can avoid them.
- Pitfall 1: Vague Prompting. Writing “a cool car” and expecting a miracle. This is “garbage in, garbage out.”
- My Solution: Always use my 4-part prompt: Style + Scene + Subject + Mood. Be hyper-specific. The more detail you give the AI, the more it will give you.
- Pitfall 2: Expecting a Finished Product. Getting frustrated when the first image isn’t perfect and giving up.
- My Solution: Change your mindset. AI is a concepting tool, not a “finish” button. Expect to generate 10-20 images to get the parts you need for your final edit.
- Pitfall 3: Losing Your Own Style. Your work starts to look like everyone else’s (the generic “Midjourney look”).
- My Solution: Your style comes from your idea (the sketch) and your post-production (the edit). Use the AI as the “manpower” in the middle, but ensure your unique human creativity is the “bread” on both sides of that sandwich.
Here is a quick troubleshooting guide I follow.
| The Problem | My Solution / Process |
| “The image looks fake or ‘plasticky’.” | Add “photorealistic,” “high-resolution,” or “style of a [specific camera lens, like 85mm]” to your prompt. Fixing lighting in post-production also helps. |
| “The AI isn’t giving me the composition I want.” | Use a more controlling tool (like Stable Diffusion with img2img) and feed it your sketch. Or, generate elements separately and composite them in Photoshop. |
| “I keep getting weird hands, eyes, or text.” | Use inpainting/vary region to re-generate only that small, broken area. If that fails, I paint over it or grab a better hand/eye from another generation and composite it. |
| “My prompts are being ignored.” | You’re probably being too complex. Simplify. Ask for one key thing at a time. Instead of “a man running and a dog jumping,” try “a man running” and then inpaint “a dog jumping.” |
Frequently Asked Questions (FAQs)
Does this AI workflow replace the need for a human designer?
Absolutely not. As you can see from my process, the AI doesn’t have the idea, and it doesn’t do the final polish. The human designer is the director. The AI is just a new, very fast actor. It replaces the “blank page” and tedious parts of the job, freeing up designers to focus on high-level concepts and refinement.
Which AI is best for realistic product mockups vs. artistic concepts?
For artistic, “epic” concepts, I lean on Midjourney. For realistic product mockups, I’ve had more success with DALL-E 3 or specific Stable Diffusion models trained on product photography. These tools are better at understanding prompts like “a white bottle with a green cap on a marble surface.”
How do you handle copyright and commercial use of AI-generated images?
This is a critical, evolving area. The short answer: I always check the Terms of Service for the specific tool I’m using (Midjourney, OpenAI, etc.). Generally, most paid plans grant you broad commercial rights to the images you create. However, I always edit, composite, and modify the images heavily in Photoshop. This adds a significant layer of human authorship, which strengthens my claim to the final, derivative work.
What’s the biggest mistake beginners make when using AI for design?
The biggest mistake is believing the AI. Beginners take the first good-looking image and try to use it. My process is built on distrusting the first output. I treat it as a draft. The real work is in the iteration and the final edit. Don’t be a prompt-taker; be an art director.
Conclusion: AI is Your Co-Pilot, Not Your Autopilot
Turning a rough idea into a powerful visual concept is faster and more dynamic than ever. But the process hasn’t been fully automated—it’s been amplified.
My workflow keeps the most important elements human-centric: the initial idea (the sketch) and the final quality control (the edit). The AI is the powerful engine in the middle that connects those two points with incredible speed. It allows me to explore dozens of creative directions in the time it used to take to create just one.
If you’re a designer or marketer, I encourage you to stop thinking of AI as a magic button. Start thinking of it as your new, tireless creative assistant. Start with your sketch, write your ‘creative brief’ prompts, iterate until you have the parts you need, and then use your own professional skills to build the final, polished concept. That’s how you move from just generating images to truly designing with AI.