
When I first started growing herbs, I had a simple goal: stop killing plants. But once I figured out the right light and watering schedule for my small apartment setup, I ran into a problem I didn’t expect. I had too much. My oregano was taking over its pot, and the thyme was spilling onto the floor. I couldn’t eat it fast enough. That is when I realized I needed to learn how I dry herbs effectively so my hard work wouldn’t end up in the trash.
I got into indoor container herb gardening after trying to keep a few basic herbs alive in a small apartment and realizing how little straightforward information existed for people working with limited space. What started as a simple attempt to grow basil on a windowsill gradually became a more deliberate process of testing different containers, light setups, and growing routines. Because I don’t have a pantry the size of a garage or fancy dehydrating equipment, I needed methods that worked in a regular kitchen. I spent the last two growing seasons testing the two most accessible ways to preserve a harvest: air-drying and oven-drying.
This guide covers exactly what happened when I pitted these two methods against each other. I tested them on sturdy herbs like rosemary, thyme, and oregano. I wanted to see which method kept the best flavor, which was easier to manage in a small space, and which one actually resulted in herbs I wanted to cook with later.
Why I Started Drying My Own Herbs
Buying dried herbs at the grocery store is easy, but the quality usually disappoints me. You buy a jar of “oregano,” and inside it’s just greyish dust that smells faintly like hay. When I finally dried my own clippings, the difference was shocking. My home-dried oregano remained bright green. When I crushed it between my fingers, the smell filled the entire kitchen.
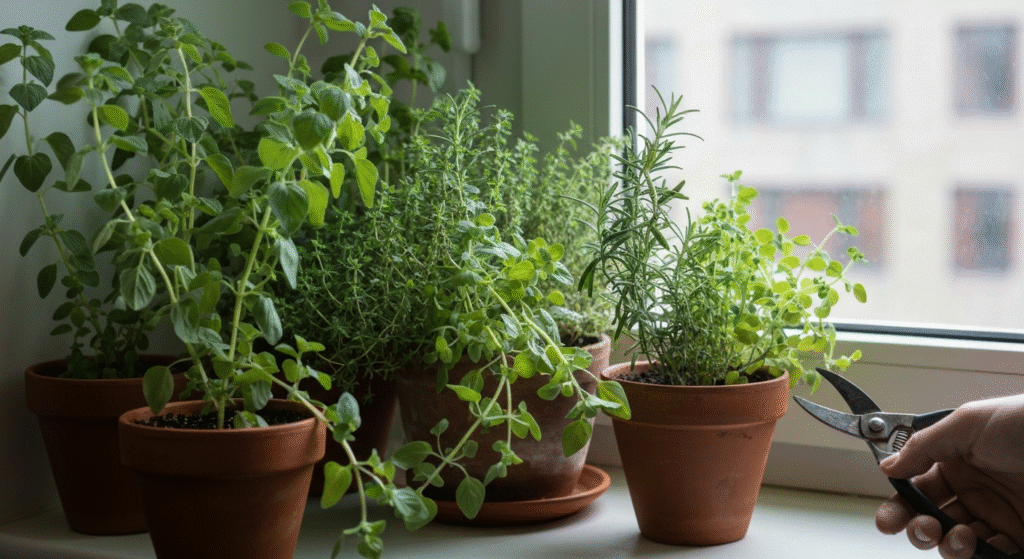
There is also the practical side. In a small apartment, my indoor garden is precious real estate. If I don’t prune my plants, they get woody and crowd each other out. Drying allows me to trim the plants back to keep them healthy while saving that flavor for a Tuesday night pasta sauce three months from now.
I focused my testing on what I call the “sturdy” herbs. These are plants with woody stems and lower moisture content in the leaves.
- Rosemary
- Thyme
- Oregano
- Sage
I found that tender, leafy herbs like basil or parsley are much trickier to dry without losing all their flavor, so I usually handle them differently (more on that later). For this test, I used cuttings from my rosemary and thyme plants.
Method 1: Air-Drying (The Slow and Steady Way)
Air-drying is the oldest method in the book. It requires zero electricity and very little active work. However, I found it requires patience and the right environment. Since I live in an apartment, air circulation can sometimes be an issue, so I was curious if this would actually work or if my herbs would just get moldy.
My Setup for Air-Drying
I kept this very low-tech. I didn’t buy a fancy drying rack. I used what I had in my junk drawer.
- Bundling: I took my harvested stems (about 5 to 8 stems per bundle) and tied them together at the base. I used plain kitchen twine, but a rubber band actually works better. As the stems dry, they shrink. A rubber band tightens with them, whereas stems can slip out of a twine knot and fall on the floor.
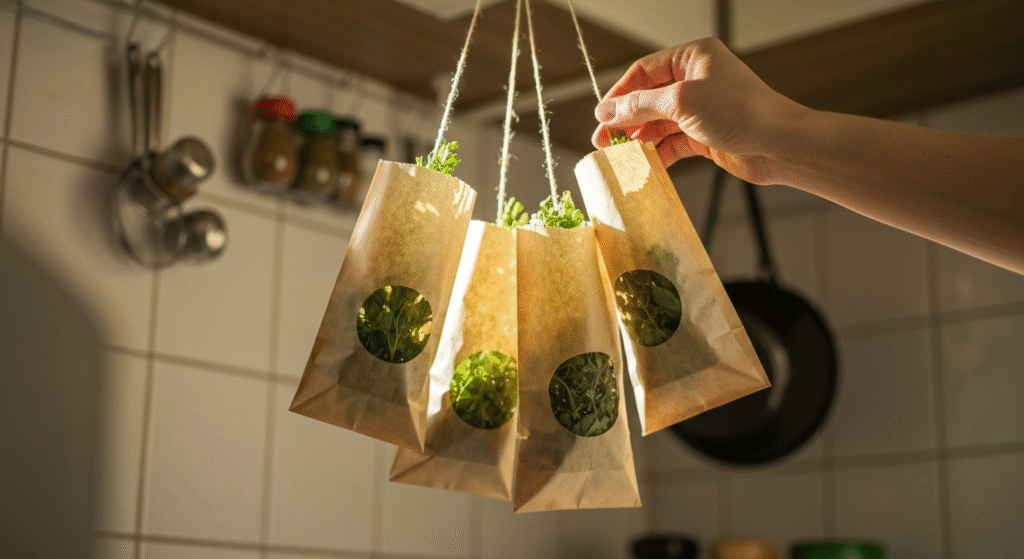
- Protection: Dust is a real thing in my apartment. To keep the herbs clean, I poked a few holes in a small paper lunch bag. I placed the herb bundle upside down inside the bag, tying the opening around the stems. The holes let air flow through, but the bag kept dust (and cat hair) off the sticky leaves.
- Hanging: I hung the bags in a corner of my kitchen that doesn’t get direct sunlight. Sunlight is the enemy here; it bleaches the color and kills the flavor oils.
The Waiting Game
This method is not for the impatient. I checked my rosemary and thyme bundles after three days, and they felt exactly the same as when I cut them.
It took about 7 to 14 days for the herbs to fully dry. The timing depended heavily on the weather. During a rainy week, it took the full two weeks. When the heat was on in my building and the air was drier, they were ready in about eight days.
Results of Air-Drying
The results were excellent, even if they took a while.
- Color: The thyme remained a deep, dark green.
- Flavor: Very potent. The slow drying process seemed to preserve the essential oils well.
- Texture: The leaves were crispy but not burnt.
Here is my personal breakdown of the air-drying experience:
| Feature | My Observation |
| Time to Finish | 7–14 days (felt like forever). |
| Effort Level | Very Low. Tie it and forget it. |
| Equipment | String/Rubber band, paper bag. |
| Flavor Retention | Excellent. The best of the two methods. |
| Risk of Failure | Moderate. If it’s humid, mold can grow inside the bag. |
Method 2: Oven-Drying (The “I Need It Now” Way)
I don’t always have two weeks to wait. Sometimes I need to clear out space immediately, or I just don’t want bags hanging in my kitchen. That is where the oven method comes in. I was nervous about this because I have burned toast more times than I can count. Cooking herbs until they are dry sounds a lot like just cooking them until they are burnt.
My Setup for Oven-Drying
The goal here is to dry the herbs, not bake them. You need the lowest temperature possible.
- Prep: I stripped the leaves off the rosemary stems because the woody stems take too long to dry. For thyme, I left the tiny sprigs whole because stripping fresh thyme is a nightmare.
- The Tray: I lined a baking sheet with parchment paper. I learned the hard way not to skip this. Direct contact with the metal pan can create “hot spots” that scorch the leaves.
- Spacing: I spread the herbs out in a single layer. If you pile them up, the ones in the middle steam instead of dry.
- Temperature: I set my oven to its lowest setting. On my dial, that is marked as 170°F, but I aimed for anything under 200°F. If your oven runs hot, prop the door open slightly with a wooden spoon to let heat escape.
The Process
I put the tray in and set a timer for 30 minutes. You cannot walk away from the oven method.
- 30 Minutes: The herbs looked wilted and sad, but still wet.
- 60 Minutes: The kitchen started to smell amazing, like a roast dinner. The rosemary was getting stiff.
- 90 Minutes: The thyme was almost done. The rosemary needed more time.
- 2 Hours: Most of my batch was dry.
Total time was roughly 2 to 4 hours, depending on how thick the leaves were. I had to flip the herbs around every 30 minutes to make sure they dried evenly.
Results of Oven-Drying
The oven method worked, but the quality was slightly different than air-drying.
- Color: The herbs were a duller green, slightly brownish in spots where the heat was higher.
- Flavor: Good, but slightly “cooked.” It lacked that raw, punchy scent the air-dried version had.
- Texture: Very brittle. They crumbled into powder instantly.
Here is what I noted in my gardening log:
| Feature | My Observation |
| Time to Finish | 2–4 hours (fast results). |
| Effort Level | High. You have to watch it constantly. |
| Equipment | Oven, baking sheet, parchment paper. |
| Flavor Retention | Good, but slightly less potent than air-drying. |
| Risk of Failure | High. It is very easy to burn them if you forget. |
The “Crumble Test” – How I Know They Are Done
The biggest mistake I made early on was jarring the herbs before they were 100% dry. If there is even a tiny bit of moisture left in the center of the leaf, it will turn into mold inside the jar. You will open it a week later and find a fuzzy, grey mess.
To prevent this, I use the “Crumble Test.”
I take a leaf—usually the thickest one I can find on the tray or in the bundle—and wait for it to cool down (if it came from the oven). Then, I rub it between my thumb and index finger.
- If it bends: It is not done. It needs more time.
- If it tears silently: It is not done.
- If it snaps and crumbles into dust: It is ready.
It should sound like a dry autumn leaf being stepped on. Crisp and brittle. If I have any doubt, I leave them out for another day. It is better to over-dry them slightly than to under-dry them and rot the batch.
Storing the Harvest
Once my herbs passed the crumble test, I needed to store them. I learned that you cannot just leave them on the counter. Light and air are the enemies of dried herbs. They strip away the flavor you just worked hard to save.
I use small glass jars with tight lids. I save old spice jars, wash them out, and remove the labels. I put the dried herbs inside, usually leaving the leaves whole.
Why whole? I found that if I crush the herbs into powder before storing them, they lose flavor faster. I only crush them right when I am adding them to the cooking pot. Keeping the leaf whole protects the oils inside until the last second.
I label the jar with the name of the herb and the date. This is important. Dried herbs do not go “bad” in the sense that they will make you sick, but they do lose flavor. I aim to use my dried herbs within 3 to 6 months. After that, they are basically just green confetti with no taste.
I store the jars in a cupboard away from the stove. Heat and light degrade the quality, so a dark, cool shelf is the best spot.
A Note on Basil (The Exception)
I mentioned earlier that I tested rosemary, thyme, and oregano. You might be wondering about basil. It is the king of herbs, after all.
I tried drying basil in the oven. It turned black. I tried air-drying basil. It turned brown and tasted like nothing.
Basil has a very high moisture content compared to woody herbs. In my experience, drying basil is a waste of time. It loses almost all of its sweet, peppery flavor and just tastes like dried grass. For basil, I found that other preservation methods work much better, but drying is simply not the right tool for that specific plant. If you grow basil, use it fresh or look into other ways to keep it.
Which Method Won?
After testing both, I have a clear winner for my lifestyle.
For small batches where I just snipped a few stems to tidy up a plant, I prefer air-drying. It is passive. I can just tie it up, toss it in a bag, and ignore it. It produces the best flavor and color. Since I live in a small apartment, having a few small bags hanging in a corner doesn’t get in my way.
However, if I do a massive harvest at the end of the season and have a pile of herbs covering my table, I use the oven. I don’t have enough space to hang twenty bags of herbs. The oven allows me to process a lot of volume in one afternoon. I accept the slight loss in flavor for the convenience of getting it done quickly.
Frequently Asked Questions
Can I use a microwave to dry herbs?
I strongly advise against it. I tried this once with parsley. It sparked, smoked, and smelled terrible within 90 seconds. Microwaves cook unevenly and are too harsh for delicate herb leaves. Stick to the oven or air-drying.
Do I need to wash the herbs before drying?
Yes, but you must dry them off completely first. I rinse my cuttings to remove dust or bugs, then I lay them on a towel and pat them dry. I let them sit on the towel for an hour or two until all surface water is gone. If you try to dry wet herbs, they will steam and turn mushy.
Why did my dried herbs turn brown?
This usually means they got too hot or were exposed to too much sunlight while drying. If you used the oven, the temperature was likely above 200°F. If you air-dried, they might have been near a sunny window. Brown herbs are safe to eat, but they won’t taste very good.
How long do dried herbs last?
In my experience, they stay flavorful for about 3 to 6 months if stored in an airtight glass jar in a dark cupboard. If you open the jar and can’t smell anything, it’s time to compost them and dry a new batch.
Final Thoughts
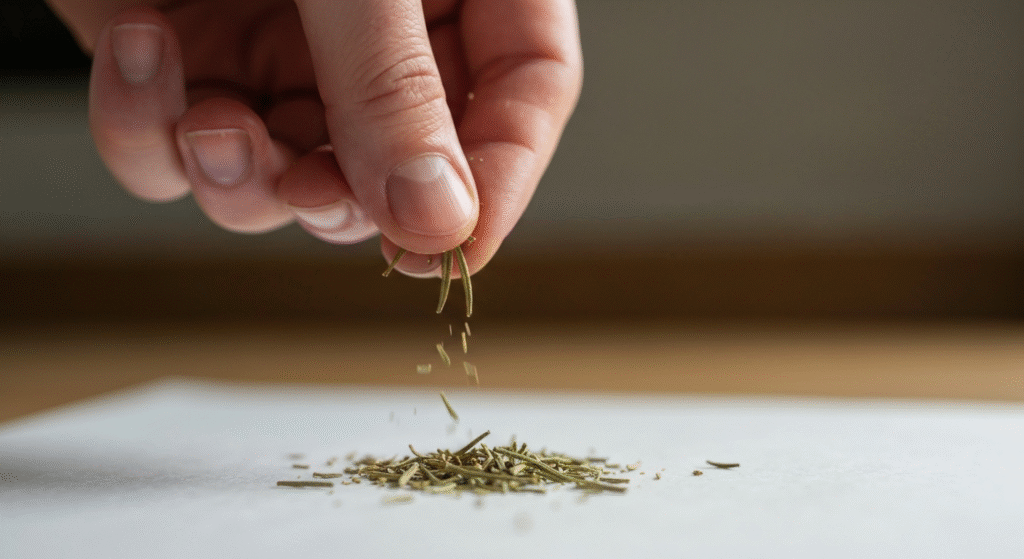
Drying herbs from my indoor garden changed how I cook. It stopped me from feeling guilty about wasting fresh trimming, and it saved me money at the grocery store. It is a satisfying feeling to sprinkle oregano onto a pizza in the middle of winter and know it came from the plant sitting on your windowsill.
The process doesn’t need to be perfect. You don’t need expensive dehydrators or a farmhouse kitchen. You just need a little patience and a watchful eye. Start with a small bundle of thyme or rosemary, give it a try, and see if you can taste the difference.
If you are looking for more safety guidelines on preserving food at home, I recommend checking out the National Center for Home Food Preservation for detailed safety standards.
Would you like me to outline the next article on how to handle soft herbs like basil and parsley since drying them proved difficult?