
When I first brought a basil plant into my small apartment about 18 months ago, I treated it like a vending machine. I needed a few leaves for dinner, so I would just reach over and pluck the biggest, tastiest-looking ones off the bottom of the stem. It seemed logical enough—take the big leaves, let the little ones keep growing.
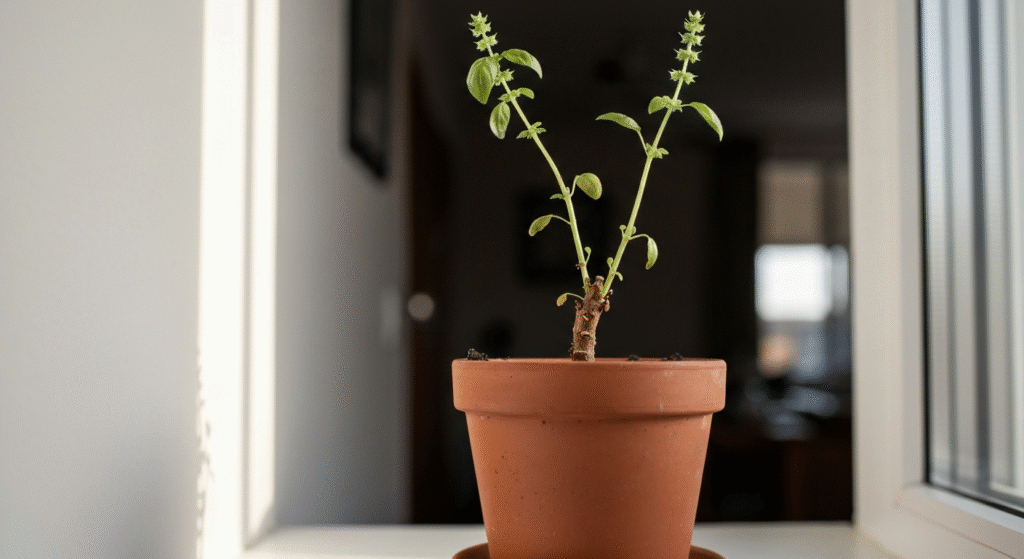
I didn’t realize that I was slowly suffocating the plant’s potential. Within three weeks, that lush green pot I bought was just a collection of tall, woody sticks with a few sad leaves at the very top. I thought I just didn’t have a “green thumb.”
It wasn’t until I stopped looking at harvesting as “taking” and started viewing it as “pruning” that everything changed. Through a lot of trial and error—and sacrificing more than a few spindly plants—I learned that where you cut matters significantly more than how much you cut.
Once I mastered the “cut above the node” method, my relationship with my container garden shifted. Instead of my basil dying after a month, it started doubling in size. I wasn’t just harvesting dinner; I was signaling the plant to grow denser. If you are tired of your basil turning into a stick figure, this guide covers the exact method I use to harvest while keeping the plant alive and kicking.
Why Plucking Individual Leaves Kills Your Plant
We need to address the most common mistake first because it is the one I made for months. It feels natural to just snap off a large leaf from the side of the stem. You get your herb, and the plant looks mostly the same.
But here is the thing: basil grows vertically. It has a primary drive to grow tall, flower, make seeds, and then die. This is a biological process called “apical dominance.” The plant pumps all its energy to the very top tip of the main stem.
When you pluck leaves off the sides (especially the bottom ones), you aren’t interrupting that vertical signal. You are just removing the plant’s solar panels (the leaves) while it continues to stretch upward. The stem gets woody and tough because it needs to support that vertical growth. Eventually, you run out of leaves, and the plant is too tall and weak to support new growth.
My early plants looked like palm trees—long bare trunks with a tiny tuft of green at the top. That is the result of plucking. To keep basil producing in a small container environment, you have to interrupt that vertical signal physically.
The Difference Between Plucking and Pruning
I used to think these were the same thing. They aren’t. I put together this quick comparison based on what I’ve observed in my own pots over the last year.
| Feature | Plucking (The Wrong Way) | Pruning (The Node Method) |
| Action | Removing single leaves from the stem. | Cutting the stem itself. |
| Plant Reaction | Continues growing straight up. | Redirects energy to side shoots. |
| Result | Tall, leggy, weak plants. | Bushy, wider, productive plants. |
| Harvest Yield | Decreases over time. | Increases over time. |
| Lifespan | Short (plant bolts/flowers quickly). | Extended (vegetative state lasts longer). |
By switching to the method I am about to explain, you aren’t just gathering food; you are actually performing maintenance that extends the life of your herb garden.
Anatomy of a Basil Plant: Finding the “Node”
Before you bring scissors anywhere near your plant, you have to identify the target. The entire strategy hinges on one specific part of the plant anatomy: the node.
When I first read about “cutting above the node,” I was confused. I looked at the stem and just saw green stalks. I didn’t know what a node actually looked like.
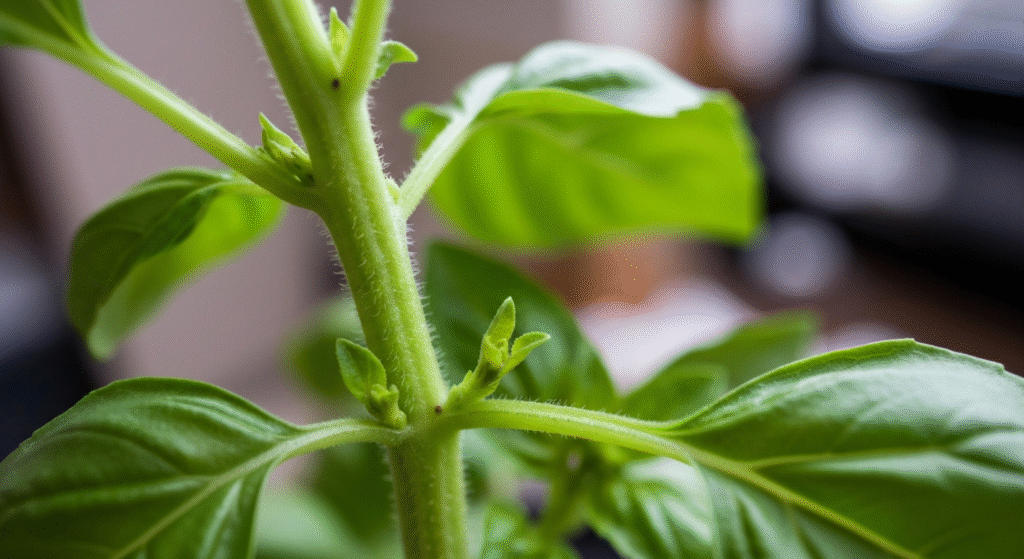
A node is the point on the main stem where leaves emerge. On basil, leaves grow in pairs on opposite sides of the stem. If you look closely at your plant, you will see a set of leaves on the left and right, growing from the same height on the stalk.
The “Sleeping” Future Stems
If you look even closer at that junction—right where the leaf stem (petiole) meets the main stalk—you will often see two tiny, baby leaves tucked in the armpit of the big leaves.
Those tiny leaves are actually dormant buds. They are sleeping stems.
As long as the main stem above them is intact, the plant suppresses those buds. It keeps them asleep so it can focus energy on the top. But the moment you cut the main stem just above them, the plant panics (in a good way). It realizes the top is gone, so it wakes up those two sleeping buds.
Those two tiny buds will grow into two entirely new branches. This is how you turn one stem into two.
The Cut Above the Node Method: A Step-by-Step Guide
Now that we know what we are looking for, let’s walk through the actual harvest. I do this roughly every 7 to 10 days when my plants are in their active growth phase.
Step 1: Assess the Plant Height
I generally wait until my basil stem has at least three to four sets of “true leaves.” If the plant is too small (under 6 inches), I leave it alone. I learned the hard way that cutting a baby plant too early can stunt it permanently because it doesn’t have enough remaining leaves to generate energy.
I look for a stem that is looking a bit tall or heavy. That is my target.
Step 2: Locate Your Cut Point
Trace your finger down from the top of the stem. Skip the very top cluster of tiny leaves. Go down to the next set of leaves. Then go down one more.
Usually, I aim to cut just above the second or third node down from the top. This ensures I am harvesting a decent amount of basil (enough for a meal) while leaving plenty of plant behind to recover.
Visualizing the Spot:
Find the pair of leaves you want to keep on the plant. Look at the stem right above where those leaves connect. That is your runway.
Step 3: The 1/4 Inch Rule
This is the specific detail that saved my garden. You need to cut the stem 1/4 inch above the node.
- If you cut too close: You might accidentally slice into those tiny sleeping buds I mentioned earlier. If you damage those buds, new stems can’t grow. The specific node becomes a dead end.
- If you cut too high: If you leave an inch of naked stem above the node, that piece of stem will rot. It serves no purpose anymore. This rotting tip can sometimes invite disease or mold that travels down into the healthy part of the plant.
I don’t use a ruler, but I eyeball about a fingernail’s width above the leaf junction.
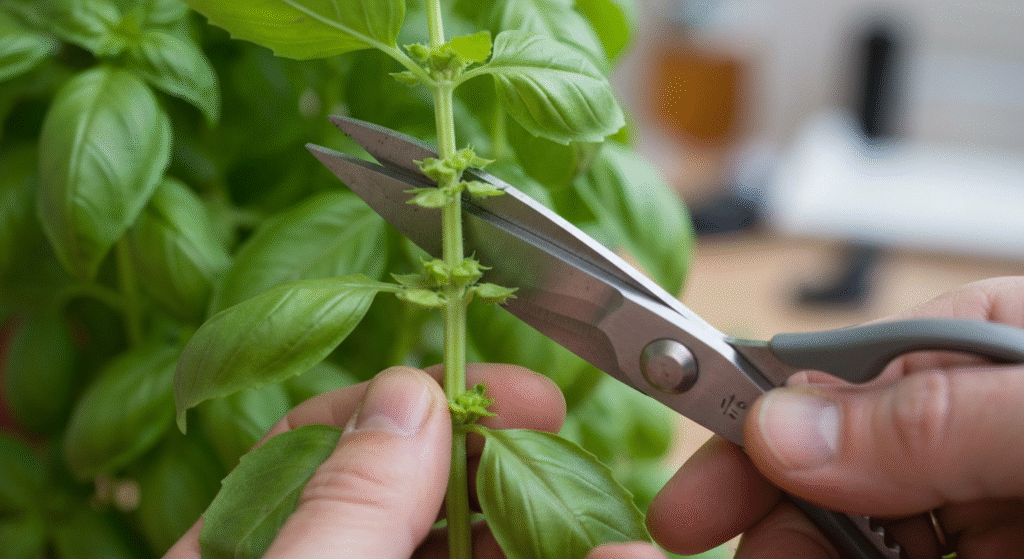
Step 4: The Snip
Take your scissors and make a clean, confident snip. Do not saw at the stem. You want a sharp cut that doesn’t crush the plant tissues.
Once you make the cut, you will be holding the top section of the stem (which is your harvest), and the plant will be left with a flat top just above a pair of leaves.
What Happens After You Cut?
It can feel scary to chop the top off your plant. I remember feeling like I had ruined the look of my garden the first time I did a heavy harvest. The plants looked flat-topped and a bit shorter.
But here is what happens biologically over the next few days.
Since the primary vertical channel is gone, the plant redistributes its growth hormones (auxins). Instead of rushing to the top, that energy pools at the highest remaining point—the node you just cut above.
Within about 3 to 5 days, you will see those tiny leaves in the “armpits” of the remaining node start to stretch.
Within 10 days, those tiny leaves will have transformed into distinct stems.
Because basil leaves grow in pairs, you get two shoots for every one you cut. This is the “Hydra effect.” Cut off one head, and two grow back. This is how container gardeners in small apartments manage to get massive yields from small pots. We aren’t planting more seeds; we are just multiplying the stems we already have.
The Golden Rule: Never Take More Than 1/3
While the node method encourages growth, it is possible to overdo it. I have definitely been guilty of getting too excited about making pesto and harvesting half the plant at once. The result was a plant that went into shock and stopped growing for weeks.
The rule of thumb I stick to now is the 1/3 Rule.
Never harvest more than one-third of the plant’s total height or foliage at one time.
Why?
Leaves are the engine of the plant. They catch sunlight and convert it into energy (photosynthesis). If you remove too many engines at once, the plant doesn’t have enough energy to heal the wound you just made, let alone push out new growth.
If I need a lot of basil, I harvest from multiple plants rather than stripping one bare. If you only have one plant, you just have to accept smaller harvests until the bush is large enough to sustain heavier cuts.
Tools of the Trade: Why Scissors Matter
When I started, I used my fingernails to pinch the stems. Many gardeners do this, and it is often called “pinching.” While it works for very soft, young tips, I found it unreliable for actual harvesting.
As the plant gets older, the stems get fibrous. When I tried to pinch a tougher stem, I would often end up crushing the tissues or stripping a strip of “skin” down the side of the stem. This ragged wound is hard for the plant to heal.
Now, I strictly use a pair of small, sharp pruning snips or even standard kitchen shears.
My Hygiene Routine:
I keep a small bottle of rubbing alcohol near my gardening shelf. Before I harvest, I give the scissor blades a quick wipe. It sounds paranoid, but in a small indoor environment, diseases spread fast. If one plant has a fungal issue and I cut it, then cut a healthy plant, I’ve just vaccinated my healthy plant with the disease. Clean cuts promote fast healing.
For more detailed information on plant diseases and proper care, I often reference the University of Minnesota Extension guide, which offers excellent, science-backed advice on keeping herbs healthy.
Troubleshooting Your Harvest
Even with the right method, things can sometimes look weird. Here are a few things I’ve noticed in my container garden and what they mean.
1. The Blackened Tips
Sometimes, a few days after harvesting, the very tip of the cut stem (that 1/4 inch stub) turns black and shrivels up.
Is this bad? generally, no. The plant is just cauterizing the wound. As long as the blackness doesn’t spread down to the node or the leaves, it’s fine. If it spreads, you might have cut too high, leaving too much dead tissue.
2. Slow Regrowth
If I cut above a node and nothing happens for two weeks, I usually check two things: light and pot size.
The node method directs energy, but it doesn’t create energy. If the plant isn’t getting enough light, it won’t have the fuel to push those new stems out, no matter how perfectly I cut it.
3. Woody Stems
Sometimes I wait too long to harvest, and the stem is hard and brown (woody) rather than green and flexible.
Can you cut into wood? You can, but regrowth is slower. Green stems are active and full of flowing juices. Woody stems are older and more stubborn. I try to harvest only from the green, upper parts of the plant. If I cut down into the woody section, the plant often struggles to generate new buds from that old hardened bark.
Making Harvesting a Routine
The shift that really helped my indoor garden succeed was making harvesting a schedule, not just a culinary decision.
In the beginning, I only harvested when I was cooking pasta. If I didn’t cook pasta for two weeks, I ignored the plant. That led to the plant trying to flower (bolt). Once basil starts to flower, the leaves turn bitter, and leaf production stops.
Now, I check my plants every Sunday.
- Are they looking tall?
- Are there flower buds forming at the tips?
- Is the canopy getting too dense?
Even if I don’t plan to cook with basil that night, I will harvest if the plant needs it. I can always give the herbs to a neighbor or find a way to use them later. The priority is the plant’s structure. By harvesting regularly, I prevent the plant from flowering, which keeps the leaves sweet and tender.
Summary of the Workflow
It can seem like a lot of information for a simple snip, but once you do it twice, it becomes muscle memory. Here is the mental checklist I run through every time I approach my windowsill:
- Sanitize: Wipe the scissors.
- Identify: Find the tall stems that need cutting.
- Locate: Find the node (the pair of leaves) I want to keep.
- Measure: Aim 1/4 inch above that node.
- Cut: Clean snip.
- Check: Ensure I haven’t taken more than 1/3 of the plant.
This method transformed my experience from constantly buying replacement plants at the grocery store to having a sustainable, regenerative garden in my apartment. It turns the act of harvesting into an act of growing.
Frequently Asked Questions
Can I use my hands to harvest if I don’t have scissors?
You can, specifically using the “pinching” method with your thumbnail and index finger, but I don’t recommend it for thicker stems. Pinching works fine for the very tender top tip, but if the stem offers any resistance, you risk crushing the plant tissues or tearing the skin. A clean cut with scissors is always safer for the plant’s health.
Does this method work if the basil has already started flowering?
Yes, and it is urgent that you do it. If you see cone-shaped flower buds forming at the tips, you should cut the stem immediately. Use the node method to cut strictly below the flower buds, down to the first set of healthy leaves. This tricks the plant into going back into “leaf-growing mode” rather than “seed-making mode.”
Is it better to harvest in the morning or at night?
I have found that harvesting in the morning is best. In the morning, the plant is fully hydrated from the night, and the essential oils (which give the flavor) are most concentrated. By late afternoon, the heat of the sun (even through a window) can cause the plant to be slightly dehydrated, making the leaves limp and less flavorful.
What if the leaves at the node are tiny? Should I still cut?
Yes! Those tiny leaves are exactly what you want. They look small now because the main stem is dominating the resources. Once you make the cut above them, they will receive a surge of energy and grow rapidly. Don’t let their small size stop you; they are the future branches of your plant.
Conclusion
Learning how to harvest basil correctly was the turning point in my indoor gardening journey. It shifted my mindset from simply consuming the plant to actively managing its architecture. By using the “cut above the node” method, you aren’t just taking leaves for your dinner; you are investing in the future yield of your garden.
It takes a little bit of faith to cut a healthy-looking stem, knowing that it will look worse before it looks better. But when you see those two new stems shooting up a week later, you realize that the scissors are just as important as the watering can. Be brave with your cuts, respect the anatomy of the node, and your small container garden will reward you with more basil than you know what to do with.